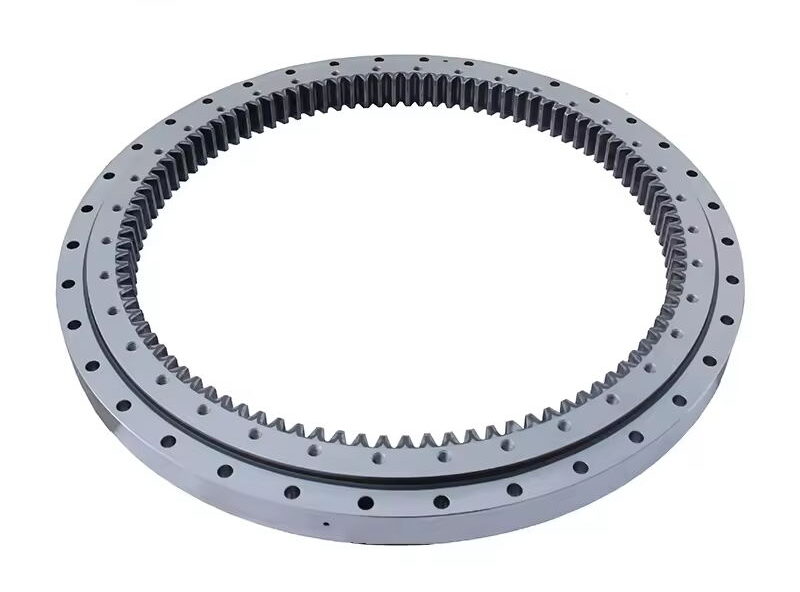
Maintaining the operational integrity of an excavator requires meticulous inspection and maintenance of its slewing bearings. These bearings are critical for the rotation of the excavator’s upper structure and must be regularly checked for wear, damage, and alignment to ensure smooth and safe operation. This blog will delve into the specific inspection equipment used for examining ρουλεμάν περιστροφής εκσκαφέα, their functions, and the technical details involved in these inspections.
Introduction to Dial Indicators
Dial indicators are precision measuring instruments used extensively in the inspection of slewing bearings. They measure the displacement or movement between the inner and outer rings of the bearing, which is crucial for assessing bearing play. Excessive play can indicate wear or damage to the raceways or rolling elements, potentially leading to operational failures if not addressed.
Function and Application
Dial indicators function by translating small linear displacements into rotational movement displayed on a dial. When inspecting a slewing bearing, the dial indicator is positioned between the inner and outer rings. As the bearing rotates, any movement or play is measured and displayed, allowing technicians to assess whether the bearing is within acceptable tolerances.
Technical Data and Specifics

The precision of a dial indicator can be up to 0.001 mm, making it highly effective for detecting even minor deviations. For instance, the recommended maximum play for a typical excavator slewing bearing might be around 0.5 mm. Any measurement exceeding this value would necessitate further inspection or potential bearing replacement. The calibration and proper use of dial indicators are essential, as inaccuracies in measurement can lead to incorrect assessments of the bearing’s condition.
Introduction to Ultrasonic Testing
Ultrasonic testing (UT) devices are non-destructive testing (NDT) tools used to detect internal flaws, such as cracks or inclusions, within the bearing material. This method uses high-frequency sound waves that travel through the bearing and reflect off any discontinuities, revealing their presence and size.
Function and Application
During ultrasonic testing, a transducer emits ultrasonic waves into the slewing bearing. These waves travel through the material and bounce back upon encountering any internal flaws. The returning echoes are captured and analyzed to determine the location and size of any defects. This method is particularly effective for detecting subsurface cracks that are not visible through visual inspection.
Technical Data and Specifics
Ultrasonic testing can detect flaws as small as 0.1 mm in depth, making it a highly sensitive inspection method. The frequency of the ultrasonic waves typically ranges from 1 MHz to 10 MHz. For excavator slewing bearings, the testing process involves scanning various sections of the bearing to ensure comprehensive coverage. The results are interpreted using A-scan or B-scan displays, which provide detailed images of the internal structure.
Introduction to Vibration Analysis
Vibration analysis tools are used to monitor the condition of slewing bearings by measuring the vibration levels produced during operation. Changes in vibration patterns can indicate various issues, such as imbalance, misalignment, or bearing wear.
Function and Application
These tools typically include accelerometers, which are sensors that detect and measure vibrations. The data collected is analyzed to identify any abnormal vibration signatures that deviate from the norm. By monitoring these patterns over time, technicians can detect early signs of bearing deterioration and take preventive measures.
Technical Data and Specifics
The sensitivity of accelerometers can range from 10 mV/g to 1000 mV/g, depending on the specific application. For slewing bearings, vibration analysis can detect faults such as bearing misalignment, imbalance, and surface defects. The vibration frequency range for typical slewing bearings might fall between 10 Hz and 1000 Hz. Detailed spectral analysis helps in pinpointing the exact nature and source of the vibration, enabling targeted maintenance interventions.
Introduction to Laser Alignment
Laser alignment tools are essential for ensuring that slewing bearings are installed correctly. Proper alignment is crucial for the bearing’s longevity and performance, as misalignment can lead to uneven wear and premature failure.
Function and Application
Laser alignment tools emit a laser beam that helps in precisely aligning the bearing components during installation. The tool consists of a laser emitter and a target detector. The laser beam is projected from the emitter to the target, and any deviations from the desired alignment are detected and corrected.
Technical Data and Specifics
Laser alignment tools offer precision levels of up to 0.01 mm/m, making them highly accurate for bearing installation. The alignment process involves setting up the laser emitter and target at specific points on the bearing and adjusting the position until the laser beam is centered on the target. This ensures that the bearing is perfectly aligned, reducing the risk of operational issues and extending the bearing’s service life.
Introduction to Feeler Gauges
Feeler gauges are simple yet effective tools used to measure the clearances or gaps between the bearing components. These gauges consist of a series of thin metal strips of varying thicknesses, which are used to gauge the size of a gap.
Function and Application
When inspecting slewing bearings, feeler gauges are used to measure the clearance between the rolling elements and the raceways. Proper clearance is crucial for the bearing’s performance, as too much or too little clearance can lead to operational issues.
Technical Data and Specifics

Feeler gauges typically range in thickness from 0.01 mm to 1 mm. To measure the clearance, a technician inserts the gauges between the bearing components until a snug fit is found. The thickness of the gauge that fits determines the clearance. For example, the acceptable clearance for a slewing bearing might be specified as 0.1 mm to 0.3 mm. Any measurement outside this range would indicate a need for adjustment or replacement.
Proper inspection and maintenance of excavator slewing bearings are critical for the safe and efficient operation of heavy machinery. The tools discussed—dial indicators, ultrasonic testing devices, vibration analysis tools, laser alignment tools, and feeler gauges—each play a vital role in ensuring the bearings are in optimal condition. By using these tools effectively, technicians can detect early signs of wear or damage, perform precise installations, and maintain the bearings’ performance, ultimately extending their lifespan and reducing downtime. Regular inspections using these advanced tools not only enhance the reliability of the excavators but also contribute to overall operational safety and efficiency.
Answer:
Dial indicators are precision measuring instruments used to assess the displacement or movement between the inner and outer rings of slewing bearings, crucial for determining bearing play. Excessive play can indicate wear or damage to the raceways or rolling elements. The dial indicator translates small linear displacements into rotational movement displayed on a dial, allowing technicians to measure the exact amount of play and determine if the bearing is within acceptable tolerances. Precision of up to 0.001 mm is common, making these tools essential for detecting even minor deviations in bearing performance.
Answer:
Ultrasonic testing (UT) devices use high-frequency sound waves to detect internal flaws within slewing bearings. During testing, a transducer emits ultrasonic waves into the bearing material. These waves travel through the bearing and reflect off any discontinuities, such as cracks or inclusions. The returning echoes are captured and analyzed to determine the location and size of the flaws. Ultrasonic testing is highly sensitive, capable of detecting flaws as small as 0.1 mm in depth, and uses frequencies typically ranging from 1 MHz to 10 MHz to provide detailed images of the bearing’s internal structure.
Answer:
Vibration analysis tools are used to monitor the condition of slewing bearings by measuring the vibration levels during operation. Changes in vibration patterns can indicate issues such as imbalance, misalignment, or bearing wear. These tools, which include accelerometers, detect and measure vibrations. The data collected is then analyzed to identify any abnormal vibration signatures. The sensitivity of accelerometers can range from 10 mV/g to 1000 mV/g, allowing for the detection of faults such as misalignment and surface defects within a vibration frequency range of 10 Hz to 1000 Hz. This helps in early detection of potential problems and prevents major failures.
Answer:
Laser alignment tools ensure that slewing bearings are installed correctly, which is crucial for their longevity and performance. Misalignment can lead to uneven wear and premature failure of the bearings. Laser alignment tools emit a precise laser beam that helps in aligning the bearing components during installation. The laser beam projected from the emitter to the target detects any deviations from the desired alignment. With precision levels of up to 0.01 mm/m, these tools ensure that the bearing is perfectly aligned, reducing the risk of operational issues and extending the bearing’s service life.
Answer:
Feeler gauges are used to measure the clearances or gaps between slewing bearing components, ensuring proper clearance which is vital for the bearing’s performance. These gauges consist of a series of thin metal strips of varying thicknesses. Technicians insert the gauges between the bearing components until they find a snug fit, with the thickness of the gauge that fits determining the clearance. Typical thickness ranges from 0.01 mm to 1 mm. Proper clearance prevents operational issues, as too much or too little clearance can lead to excessive wear or misalignment. For example, an acceptable clearance might be specified as 0.1 mm to 0.3 mm, and measurements outside this range indicate a need for adjustment or replacement.