Replacing the final drive on an excavator is a complex but essential task that ensures your machine operates efficiently. This guide will walk you through the necessary steps, tools, and precautions. Let’s dive into the process!
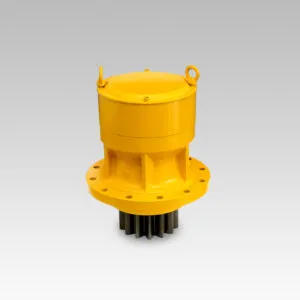
The final drive is a critical component of an excavator’s drivetrain. It transmits power from the motor to the tracks, allowing the machine to move. The final drive consists of several parts, including the hydraulic motor, planetary gears, and bearings. These components work together to convert hydraulic energy into mechanical motion. Without a properly functioning final drive, your excavator won’t be able to perform its duties effectively.
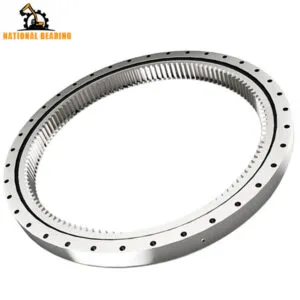
Understanding how the final drives operates can help you diagnose issues and perform maintenance tasks more efficiently. For instance, knowing the role of the planetary gears can help you identify unusual noises or vibrations that may indicate gear wear or damage. Similarly, understanding the function of the гідравлічний двигун can assist in diagnosing issues related to hydraulic pressure or fluid leaks.
Recognizing the signs of a failing final drive can save you time and money. Common symptoms include unusual noises, loss of power, oil leaks, and overheating. Unusual noises may indicate issues with the planetary gears or bearings, while a loss of power could be due to hydraulic motor failure. Oil leaks often point to damaged seals or gaskets, and overheating may result from excessive friction or lack of lubrication.
It’s essential to address these symptoms promptly to prevent further damage. For example, a minor oil leak can quickly escalate into a significant problem if not addressed, leading to hydraulic fluid loss and potential damage to other components. Regular inspections can help you catch these issues early and ensure timely replacements or repairs.
Delaying the replacement of a faulty final drive can lead to more severe damage and higher repair costs. Timely replacement ensures the longevity of your excavator and keeps your projects on schedule. Operating with a damaged final drive can strain other components, leading to a cascade of failures. For instance, a failing hydraulic motor can cause excessive wear on the gears, leading to more extensive and costly repairs.
Moreover, a well-maintained final drive contributes to the overall efficiency of your excavator. Efficient power transmission from the motor to the tracks ensures that your machine operates smoothly and consumes less fuel. This not only reduces operating costs but also minimizes downtime, allowing you to complete projects on time and within budget.

Before starting the replacement process, ensure you have all the necessary tools and equipment. This includes wrenches, screwdrivers, hydraulic jacks, lifting equipment, and safety gear. Having everything on hand will make the process smoother and more efficient. Additionally, you may need specialized tools such as a track press or torque wrench, depending on your excavator model.
It’s also a good idea to have a clean workspace with ample lighting. Lay out all your tools and components in an organized manner to save time and reduce the risk of losing small parts. Keep a container or magnetic tray handy to hold bolts, nuts, and other small items.
Moreover, make sure that all your tools are in good working condition before you start the task. This includes checking for any wear and tear that might impair their functionality. If any tools are damaged or worn out, replace them to avoid any disruption during the replacement process. Having backup tools and extra components on hand can also be very helpful in case something unexpected happens.
In terms of safety, ensure you have all necessary protective gear such as gloves, safety glasses, and protective clothing. This will help you avoid any potential injuries and ensure a safer working environment. It’s also beneficial to review the safety procedures related to your specific equipment to be well-prepared for any emergencies.
To further enhance efficiency, label and organize each component and tool according to the steps of the replacement process. This systematic approach not only saves time but also helps in identifying any missing parts before you start. Additionally, keeping a detailed checklist of all required tools and equipment can be extremely useful for double-checking and ensuring nothing is overlooked.
In summary, thorough preparation of your tools and workspace will significantly contribute to a smoother and more efficient replacement process. By taking the time to organize and check everything in advance, you minimize delays and potential risks, ensuring a successful and safe project. If you need any further assistance or have more questions, feel free to reach out!
Safety is paramount when working on heavy machinery. Always wear appropriate safety gear, such as gloves, safety glasses, and steel-toed boots. Additionally, make sure the excavator is on a level surface and securely supported to prevent accidents. Use hydraulic jacks and lifting equipment designed for the weight of your excavator to ensure stability.
Before starting any work, disconnect the battery to prevent accidental starts. Double-check that the parking brake is engaged and the boom and blade are lowered to the ground for added stability. It’s also a good practice to have a fire extinguisher nearby, just in case.
Every excavator model is different, so it’s essential to read the manufacturer’s manual for specific instructions and torque settings. This will ensure you follow the correct procedures and avoid damaging your machine. The manual often includes diagrams and step-by-step instructions tailored to your model, making the replacement process more straightforward.
In addition to torque settings, the manual may provide information on recommended lubricants and hydraulic fluids. Using the correct fluids ensures optimal performance and longevity of your new final drive. Keep the manual accessible throughout the process for quick reference.
Start by positioning the excavator in a safe and stable location. Lower the boom and blade to the ground to stabilize the machine. Engage the parking brake and turn off the engine to prevent accidental movement. Make sure the area around the excavator is clear of obstacles and other machinery to provide ample working space.
It’s also helpful to place wheel chocks behind the tracks to prevent any accidental rolling. Double-check all safety measures before proceeding with the disassembly.
Carefully disconnect the hydraulic hoses connected to the final drive. Use a clean rag to catch any leaking hydraulic fluid and prevent contamination. Label the hoses to ensure you reconnect them correctly later. Some models may have quick-connect fittings, while others may require wrenches to loosen the connections.
Take note of the hose routing and connections, as this will make reassembly easier. If necessary, take photos or make sketches to document the layout. Ensure that the hydraulic system is depressurized before disconnecting any hoses to avoid injury.
Next, remove the track links to access the final drive. This step may require a track press or other specialized tools, depending on your excavator model. Carefully document the disassembly process to make reassembly easier. Removing the track links involves loosening the track tension and separating the master link.
Use a track pin press or similar tool to remove the track pins and disconnect the links. Be cautious, as the tracks are heavy and can cause injury if mishandled. Once the tracks are removed, use wooden blocks or stands to support the excavator’s weight.
Once the track links are removed, you can access the bolts securing the final drive to the excavator. Use the appropriate wrenches and follow the manufacturer’s instructions to unbolt the final drive. Carefully lower it to the ground using lifting equipment. The final drive may be heavy, so use caution and follow proper lifting techniques to avoid injury.
Inspect the bolts and mounting surfaces for any signs of damage or wear. Clean the area around the final drive to remove any dirt or debris that may interfere with the installation of the new unit.
Before installing the new final drive, inspect the mounting area for any damage or wear. Clean the area thoroughly to ensure a proper fit for the new final drive. Address any issues before proceeding. Check for cracks, rust, or other signs of damage that may affect the installation.
If necessary, repair or replace damaged components to ensure a secure and stable mounting surface. A clean and well-prepared mounting area will help prevent issues during the installation and operation of the new final drive.
Before installing the new final drive, compare it with the old one to ensure it matches your excavator model. Check for any shipping damage and verify that all components are included. Inspect the new final drive for any signs of defects or damage, such as cracks or missing parts.
It’s also a good idea to pre-fill the new final drive with the recommended hydraulic fluid to ensure proper lubrication during the initial operation. Follow the manufacturer’s guidelines for filling and priming the new unit.
Using lifting equipment, carefully position the new final drive in place. Align it with the mounting holes and ensure it sits flush against the excavator. This step may require assistance to ensure proper alignment. Use wooden blocks or supports to hold the final drive in position while you secure it.
Ensure that the final drive is level and aligned with the driveshaft and other components. Proper alignment is crucial for smooth operation and longevity of the new final drive.
Once the final drive is in position, use the appropriate bolts and torque settings to secure it to the excavator. Follow the manufacturer’s instructions to ensure a tight and secure fit. Double-check all bolts for proper torque. Use a torque wrench to achieve the specified torque settings, as over-tightening or under-tightening can cause issues.
Re-check the alignment after securing the bolts to ensure everything is properly positioned. Tighten the bolts in a crisscross pattern to distribute the load evenly and prevent misalignment.
Reconnect the hydraulic hoses to the new final drive, ensuring they are properly labeled and connected to the correct ports. Check for any leaks and tighten the connections as needed. Use new O-rings or seals if required to prevent leaks.
After reconnecting the hoses, bleed the hydraulic system to remove any air that may have entered during the disconnection process. Follow the manufacturer’s instructions for bleeding the system to ensure proper hydraulic pressure and performance.
Reassemble the track links, following the documentation and photos you took during disassembly. Ensure the tracks are properly tensioned and aligned to prevent future issues. Use a track pin press or similar tool to reinsert the track pins and secure the links.
Adjust the track tension according to the manufacturer’s specifications to ensure proper operation. Overly tight or loose tracks can cause excessive wear and reduce the lifespan of the final drive and other components.
After installing the new final drive, perform a test run to ensure everything is functioning correctly. Start the engine and slowly move the excavator to check for any unusual sounds or vibrations. Monitor the hydraulic pressure and temperature. Pay close attention to any signs of leaks or abnormal behavior.
Test the excavator’s movement in both forward and reverse directions to ensure the final drive operates smoothly under different conditions. If you notice any issues, stop the machine and address them before continuing.
Inspect all hydraulic connections for leaks. Tighten any fittings as needed and monitor the fluid levels. Address any issues before putting the excavator back into regular use. A small leak can quickly become a significant problem if not addressed promptly.
Use a clean rag to wipe down the connections and check for any fresh leaks after the test run. Ensure that all fittings and hoses are securely tightened and properly sealed.
Over the next few days, monitor the performance of the new final drive. Pay attention to any changes in power, noise, or temperature. Regularly check the hydraulic fluid levels and inspect for leaks. Perform regular visual inspections to ensure everything remains in good condition.
Keep a log of any issues or observations during the initial operation period. This information can help you identify and address potential problems early, ensuring the longevity and reliability of the new final drive.
To extend the life of your new final drive, schedule regular maintenance. This includes checking hydraulic fluid levels, inspecting hoses and fittings, and monitoring for signs of wear. Regular maintenance ensures your excavator operates at peak performance. Follow the manufacturer’s recommended maintenance schedule and procedures to keep your final drive in optimal condition.
Performing routine inspections and addressing minor issues promptly can prevent major failures and reduce downtime. Keep detailed records of maintenance activities and any repairs performed to track the health of your final drive and other components.
Replacing an excavator final drive is a challenging but rewarding task. By following this comprehensive guide, you can ensure a successful replacement and keep your excavator running smoothly. Remember to prioritize safety, follow the manufacturer’s instructions, and monitor the performance of your new final drive. Happy excavating!