CAT374F 378-9586 Salıncak Yatağının Değiştirilmesi Hakkında Kapsamlı Kılavuz
8 Temmuz 2024
Tarafından xzgjjx
Yorum yok
When it comes to heavy machinery maintenance, replacing a swing bearing, such as the CAT374F 378-9586, is a critical operation that requires precision and adherence to specific procedures. This blog will provide a detailed, step-by-step guide on how to replace this particular swing bearing, including necessary tools, preparatory steps, detailed replacement procedures, and post-replacement checks.
Replacing the swing bearing on a CAT374F excavator is an intricate process that requires meticulous planning and execution. The swing bearing is essential for the smooth operation of the excavator, allowing it to rotate its upper structure. Over time, due to the high loads and stresses, the swing bearing may wear out, necessitating replacement. This guide aims to walk you through each step of the replacement process, ensuring that your excavator remains in optimal working condition. We will delve into the complexities of each step, providing you with a comprehensive understanding of what is involved.
Tools and Equipment Required
Before beginning the replacement process, it’s crucial to gather all the necessary tools and equipment. Having everything ready will ensure a smooth and efficient procedure. The importance of having the right tools cannot be overstated, as the complexity of this task demands precision and safety.
Necessary Tools for Replacement
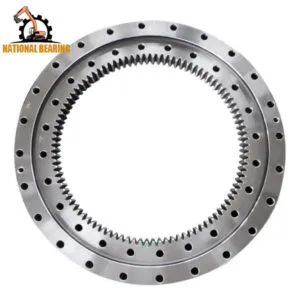
CAT374 333-3009 Döner Rulman
Basic Tools
Wrenches and Sockets: Various sizes for bolt removal and installation are required. Precision wrenches and sockets are essential to ensure that bolts are properly secured and torqued.
Torque Wrench: For precise tightening of bolts to specified torques. This is crucial to avoid over-tightening, which can lead to bolt failure, or under-tightening, which can cause loosening during operation.
Hydraulic Jacks and Supports: To lift and support the excavator safely. These tools must be capable of handling the heavy weight of the excavator’s upper structure.
Feeler Gauges: For measuring clearances between components. Accurate measurements are vital to ensure proper fit and function.
Specialized Tools
Dial Indicator: For measuring bearing play. This tool provides precise readings that are essential for diagnosing wear and ensuring the new bearing is correctly installed.
Laser Alignment Tool: To ensure proper alignment during installation. Proper alignment is critical to avoid uneven wear and potential failure.
Ultrasonic Testing Device: To check for internal flaws in the new bearing. Ensuring the new bearing is free from defects before installation is vital for long-term reliability.
Crane or Hoist: For lifting heavy components. The bearing and other large parts must be handled carefully to avoid damage and ensure safety.
Safety Equipment
Safety is paramount when working with heavy machinery. Ensure you have the following safety equipment:
Protective Gloves: To protect your hands from sharp edges and hot surfaces. Gloves should be made of durable material resistant to cuts and abrasions.
Safety Glasses: To protect your eyes from debris and fluid splashes. High-impact resistant glasses are recommended to withstand potential impacts.
Hard Hat: To protect your head from falling objects. The hard hat should meet relevant safety standards to ensure maximum protection.
Steel-Toed Boots: To protect your feet from heavy items. Boots should be comfortable yet sturdy enough to handle the work environment.
Preparatory Steps
Ekskavatörün Hazırlanması
Before starting the replacement, proper preparation of the excavator is essential. Proper preparation involves not only positioning the excavator correctly but also ensuring all systems are safely disengaged to prevent accidents.
Positioning the Excavator
Select a Level Surface: Ensure the excavator is on a flat, stable surface to prevent tipping. A stable surface minimizes risks and ensures accurate alignment during reassembly.
Lower the Boom and Attachments: Lower the boom and any attachments to the ground for stability. This reduces the center of gravity and adds stability to the structure.
Turn Off the Engine: Ensure the engine is off and the keys are removed to prevent accidental startup. Disconnect the ignition system to ensure it cannot be inadvertently started.
Güvenlik Önlemleri
Engage Hydraulic Locks: Engage all hydraulic locks to prevent any movement. This prevents accidental drops or movements that could cause injury or damage.
Disconnect the Battery: To avoid any electrical hazards. Disconnecting the battery eliminates the risk of electrical shorts or unintended equipment activation.
Secure the Area: Place warning signs and barriers to keep unauthorized personnel away. Clearly mark the work area to prevent unauthorized access and potential hazards.
Inspection and Documentation
Inspecting the Existing Bearing
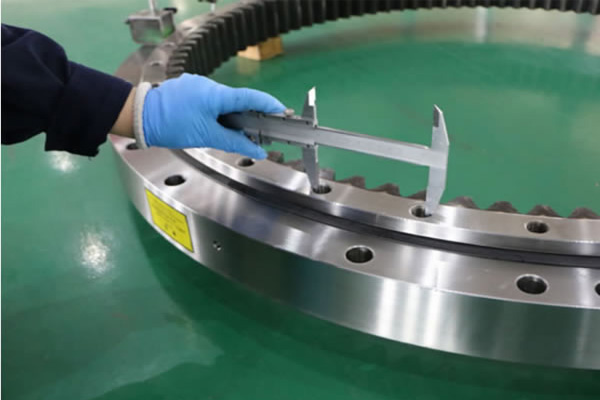
Görsel Denetim: Check for visible signs of wear, cracks, or damage. Look for any irregularities on the bearing surface that indicate excessive wear or potential failure points.
Check for Play: Use a dial indicator to measure any excessive play in the bearing. Documenting the current state helps in diagnosing issues and ensures accurate replacement.
Documentation
Take Photos: Document the current state of the bearing and its surroundings. Photos provide a visual reference that can be invaluable during reassembly.
Record Measurements: Note down any measurements and observations for reference. Detailed records help in verifying that the new installation meets required specifications.
Detailed Replacement Procedures
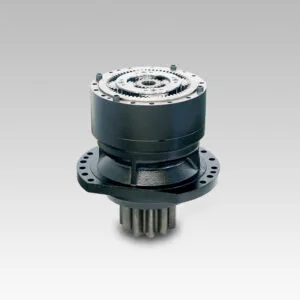
CAT374F 378-9586 Salıncak Yatağı
Removing the Old Bearing
Lifting and Supporting the Upper Structure
Attach Hydraulic Jacks: Place hydraulic jacks under the excavator’s upper structure. Ensure the jacks are rated for the weight and positioned correctly.
Lift the Structure: Carefully lift the structure until there is enough clearance to access the swing bearing. Monitor the lifting process to avoid any imbalance.
Secure with Supports: Place sturdy supports to hold the structure safely in place. Double-check the supports for stability before proceeding.
Detaching Hydraulic Lines and Electrical Connections
Label Connections: Label all hydraulic lines and electrical connections for easy reassembly. Use durable tags that won’t fall off during the process.
Disconnect Lines: Carefully disconnect all lines and connections from the bearing assembly. Use proper tools to avoid damaging connectors.
Removing Fasteners
Locate All Bolts: Identify all bolts securing the swing bearing. Ensure you have the correct tools for the specific bolt sizes.
Remove Bolts: Use appropriate wrenches and sockets to remove the bolts systematically. Follow a pattern to ensure even removal and avoid warping.
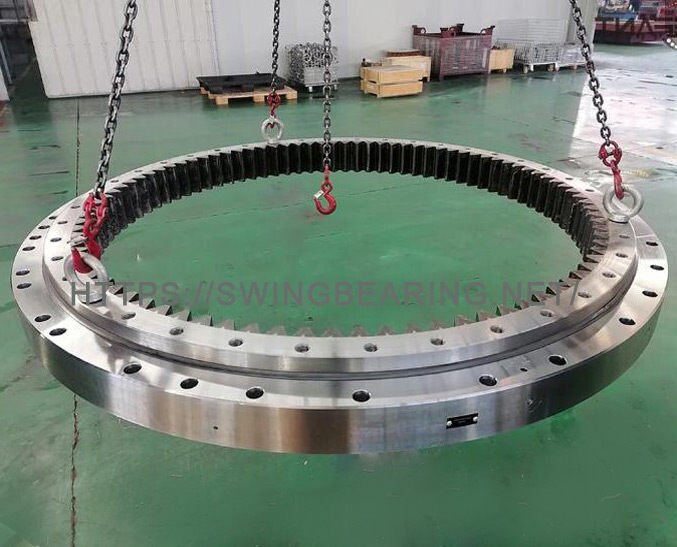
Lift the Bearing: Use a crane or hoist to lift the old bearing out of its seating. Handle the bearing carefully to avoid damage to surrounding components.
Installing the New Bearing
Preparing the New Bearing
Clean the Bearing Seat: Ensure the seating area is clean and free of debris. Any debris can cause misalignment and premature wear.
Inspect the New Bearing: Use ultrasonic testing to check for any internal flaws in the new bearing. Ensure it meets all specifications before proceeding.
Placing the New Bearing
Align with Seating: Carefully align the new bearing with the seating area. Proper alignment is crucial for smooth operation.
Lower into Place: Use the crane or hoist to lower the bearing into its position. Lower it slowly to avoid any sudden impacts.
Securing the New Bearing
Insert Bolts: Place the bolts into the bearing and finger-tighten them initially. Ensure all bolts are correctly aligned and seated.
Torque the Bolts: Use a torque wrench to tighten the bolts to the manufacturer’s specifications, usually in a crisscross pattern to ensure even distribution. Over-tightening can damage the bolts, while under-tightening can lead to loosening.
Reconnecting Hydraulic and Electrical Lines
Hydraulic Lines
Reconnect Lines: Attach all previously labeled hydraulic lines to their respective ports. Ensure they are properly seated and secured.
Sızıntıları Kontrol Edin: Once connected, check for any potential leaks in the hydraulic lines. Tighten connections as necessary to prevent fluid loss.
Electrical Connections
Reconnect Wires: Attach all labeled electrical connections. Double-check each connection to ensure it is correct.
Test Connections: Ensure all connections are secure and functioning properly. Use diagnostic tools to verify electrical integrity.
Alignment and Final Checks
Laser Alignment
Set Up Laser Tool: Place the laser alignment tool on the bearing. This will help ensure the bearing is correctly aligned with the excavator structure.
Adjust Bearing: Make necessary adjustments to ensure the bearing is properly aligned with the excavator structure. Proper alignment is critical to prevent uneven wear and potential operational issues.
Testing and Calibration
Re-engage Hydraulic Systems: Turn on the hydraulic systems and check for proper operation. Ensure there are no leaks and that the systems respond correctly.
Measure Bearing Play: Use a dial indicator to measure any play in the new bearing, ensuring it is within acceptable limits. Document these measurements for future reference.
Post-Replacement Procedures
Final Inspection
Visual and Functional Checks
Check for Proper Operation: Operate the excavator to ensure the swing bearing is functioning smoothly. Listen for any unusual noises that may indicate a problem.
Inspect for Leaks: Look for any hydraulic or oil leaks around the bearing. Any leaks should be addressed immediately to prevent further issues.
Record Observations
Document Findings: Note down any observations or issues encountered during the replacement process. Detailed records help in diagnosing any future problems.
Save Data: Save all measurements and test results for future reference. This data can be invaluable for future maintenance and troubleshooting.
Bakım İpuçları
Regular Lubric
ation
Lubricate Bearings: Regularly lubricate the swing bearing according to manufacturer recommendations. Proper lubrication reduces wear and extends bearing life.
Check Lubricant Levels: Ensure lubricant levels are maintained to prevent dry running and wear. Use the recommended lubricant type for best results.
Planlı Denetimler
Routine Checks: Perform routine checks on the bearing for any signs of wear or damage. Early detection can prevent major failures.
Preventive Maintenance: Follow a preventive maintenance schedule to extend the life of the bearing. Regular maintenance helps ensure long-term reliability.
Sonuç
Replacing the swing bearing on a CAT374F excavator, particularly the 378-9586 model, is a complex task that requires careful attention to detail and adherence to specific procedures. By following this comprehensive guide, you can ensure a successful replacement, extending the life of your excavator and maintaining its operational efficiency. Proper preparation, precise execution, and thorough post-replacement checks are crucial to achieving the best results. Regular maintenance and inspections will further ensure the longevity and reliability of the new bearing, keeping your excavator in top working condition for years to come. This guide aims to equip you with the knowledge and confidence needed to perform this task with precision and safety.
How to determine if the CAT374F 378-9586 swing bearing needs to be replaced? Answer: Typically, the need for replacement of the excavator swing bearing can be indicated by abnormal vibration, increased noise, elevated temperature, or poor lubrication. Regular inspections and maintenance practices, such as monitoring vibration, temperature, and sound levels, as well as analyzing lubricating oil, can help identify bearing issues early on.
What are the steps for replacing the CAT374F 378-9586 swing bearing? Answer: The steps for replacing the excavator swing bearing usually include: preparation (ensuring the excavator is stable and power source is disconnected), disassembly of the old bearing (removing the old bearing and related components), installation of the new bearing (fitting the new bearing and alignment), and inspection and testing (checking for proper bearing installation and conducting necessary adjustments).
What are the precautions to be taken during the replacement of the CAT374F 378-9586 swing bearing? Answer: When replacing the CAT374F 378-9586 excavator swing bearing, it is important to: use the correct tools and equipment for the operation, follow the manufacturer’s guidelines and specifications, prioritize safety to prevent accidents or injuries, and maintain cleanliness during the replacement process to avoid dust and contaminants from entering the bearing.