Installing a swing drive assembly can seem daunting, but with the right steps and guidance, it can be accomplished smoothly. In this comprehensive guide, we will walk you through every stage of the installation process, ensuring you have all the information you need. Let’s dive in!
Understanding the Basics of a Swing Drive Assembly
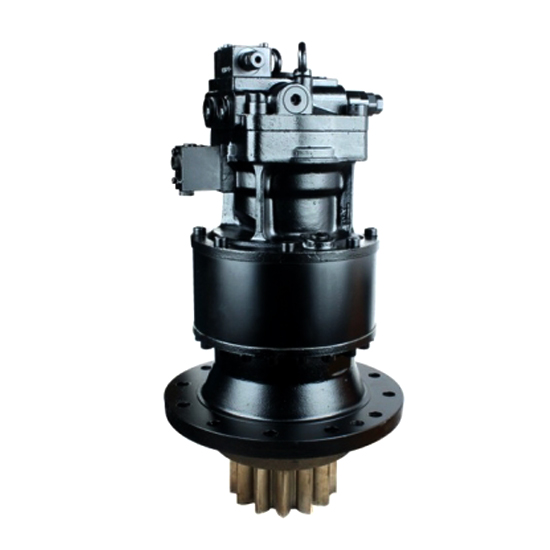
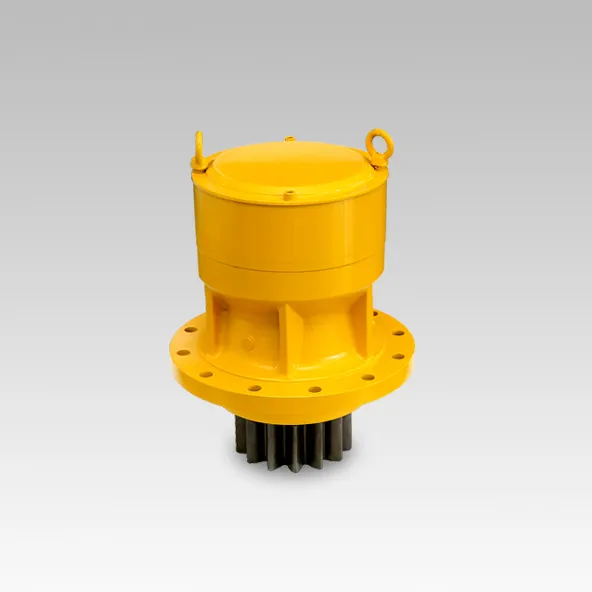
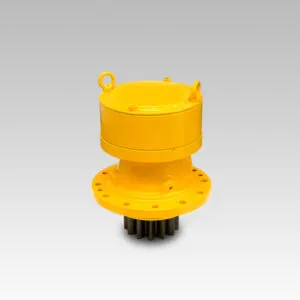
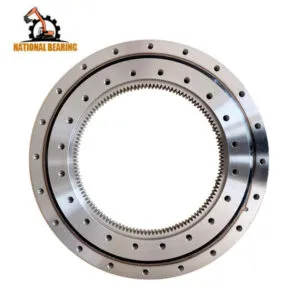
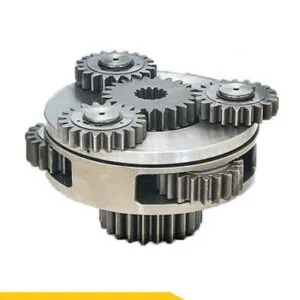
What is a Swing Drive Assembly?
A swing drive assembly is a crucial component in various types of machinery, particularly in construction equipment like excavators. It allows the upper structure of the machine to rotate, providing flexibility and maneuverability. Knowing its function helps in appreciating the importance of a precise installation.
Importance of Proper Installation
Proper installation of a swing drive assembly ensures the smooth operation and longevity of the machinery. Incorrect installation can lead to operational failures, increased wear and tear, and even complete breakdowns. Therefore, understanding the installation process is vital.
Preparing for Installation
Samle inn nødvendig verktøy og utstyr
Before you begin the installation, make sure you have all the necessary tools and equipment. This typically includes wrenches, screwdrivers, torque wrenches, hydraulic fluid, and the swing drive assembly itself. Having everything on hand will make the process more efficient.
Forholdsregler for sikkerhet
Safety should always be a priority. Wear appropriate protective gear such as gloves, safety glasses, and steel-toed boots. Ensure that the machinery is turned off and properly secured to prevent any accidental movements.
Reviewing the Manufacturer’s Manual
Each swing drive assembly may have specific instructions provided by the manufacturer. Review these instructions carefully to understand any unique steps or considerations. This will help avoid any mistakes and ensure a smooth installation.
Step 1: Removing the Old Swing Drive Assembly
Steps to Install a Swing Drive Assembly
Disconnecting Hydraulic Lines
Forholdsregler for sikkerhet: First and foremost, ensure that the machinery is completely turned off and disconnected from any power sources. Wear appropriate personal protective equipment (PPE) such as gloves and safety goggles to protect yourself from any hydraulic fluid that might spill.
Prepare for Fluid Spill: Place a container underneath the hydraulic lines to catch any hydraulic fluid that may spill out when you disconnect the lines. A large container with a capacity of several liters will be ideal.
Disconnecting the Lines: Use the appropriate wrenches or tools to slowly loosen the hydraulic lines connected to the old swing drive assembly. It’s important to do this step gradually to allow the hydraulic fluid to flow into the container, minimizing spills.
Sealing the Ends: Once the hydraulic lines are disconnected, use appropriate sealing caps or plastic bags to cover the ends of the hydraulic lines. This will prevent any dirt or debris from entering the hydraulic system.
Unbolting the Assembly
Identifying the Bolts: Locate all the bolts securing the old swing drive assembly. These bolts are typically found at the base or sides of the assembly.
Unbolting: Use the correct wrenches or tools to loosen and remove each bolt holding the old swing drive assembly in place. You may need a variety of wrench sizes, so have multiple tools ready.
Lifting and Removing: After ensuring all bolts are removed, use lifting equipment like a crane or hoist to carefully lift and remove the old swing drive assembly. Make sure the process is steady and secure to avoid any accidents.
Step 2: Preparing the Mounting Area
Cleaning the Surface
Removing Debris: Use a brush, clean cloth, or air compressor to remove any debris and old grease from the mounting area.
Degreasing: Apply an appropriate degreaser to clean the surface thoroughly. This step ensures that there is no residual grease or dirt, which is crucial for a secure fit for the new assembly.
Inspecting for Damage
Visuell inspeksjon: Carefully inspect the mounting area for any signs of damage or wear, such as cracks, dents, or corrosion.
Addressing Issues: If any damage is found, repair or replace the affected parts to ensure that the new swing drive assembly can be installed correctly and function properly.
Step 3: Installing the New Swing Drive Assembly
Positioning the Assembly
Aligning the Holes: Carefully position the new swing drive assembly in the mounting area, making sure it aligns correctly with the mounting holes.
Using Guides: If the assembly has positioning pins or guide holes, use these guides to ensure proper alignment.
Securing the Assembly
Bolting in Place: Use the appropriate bolts and wrenches to initially secure the assembly in place. Do not fully tighten the bolts at this stage to allow for any necessary adjustments.
Spesifikasjoner for dreiemoment: Follow the manufacturer’s recommended torque specifications and use a torque wrench to tighten all bolts to the specified torque. This ensures that the assembly is securely fastened.
Step 4: Reconnecting Hydraulic Lines
Attaching Hydraulic Lines
Checking Connections: Inspect the hydraulic lines for any signs of damage or wear before reconnecting them.
Reconnecting: Reconnect the hydraulic lines to the new swing drive assembly using wrenches to ensure that each connection is tight and secure, preventing any leaks.
Refilling Hydraulic Fluid
Checking Levels: Open the hydraulic fluid reservoir and check the fluid level. If the level is below the recommended mark, prepare to add the appropriate hydraulic fluid.
Adding Fluid: Use a funnel to slowly add hydraulic fluid into the reservoir until it reaches the recommended level. Make sure to use the correct type of hydraulic fluid as specified by the manufacturer.
Step 5: Testing the Installation
Running Initial Tests
Starting the Machinery: Start the machinery and observe the new swing drive assembly for any unusual noises or movements.
Overvåking av ytelse: Allow the machinery to run for a sufficient period to ensure that the hydraulic system is operating smoothly without any leaks or other issues.
Final Adjustments
Tightening Bolts: Based on the test results, check all bolts to ensure they are properly tightened and make any necessary adjustments.
Adjusting Hydraulic Lines: If there are any leaks or issues with the hydraulic lines, make the necessary adjustments or replacements to ensure everything operates correctly.
Feilsøking av vanlige problemer
Svingdrevsenhet
Issue 1: Hydraulic Leaks
Identifying the Source: If you notice hydraulic fluid leaking, identify the source of the leak. This could be due to loose connections or damaged seals.
Fixing the Leak: Tighten any loose connections and replace damaged seals. Ensure that the hydraulic lines are properly connected and secure.
Issue 2: Unusual Noises
Diagnosing the Noise: Unusual noises during operation could indicate misalignment or loose components. Carefully inspect the assembly to identify the source of the noise.
Addressing the Issue: Tighten any loose components and ensure that the assembly is properly aligned. If the noise persists, consult the manufacturer’s manual for further guidance.
Issue 3: Poor Performance
Checking Hydraulic Fluid Levels: Low hydraulic fluid levels can lead to poor performance. Check the fluid levels and refill as necessary.
Inspecting for Damage: Inspect the swing drive assembly for any signs of damage or wear. Replace any damaged components to restore optimal performance.
Maintenance Tips for Longevity
Regelmessige inspeksjoner
Regular inspections are crucial to maintaining the performance and longevity of the swing drive assembly. Schedule periodic checks to identify and address any issues early on.
Lubrication and Fluid Checks
Ensure that the swing drive assembly is properly lubricated and that hydraulic fluid levels are maintained. This helps in reducing wear and tear and prevents operational issues.
Håndtering av slitasje og elde
Pay attention to signs of wear and tear, such as unusual noises, vibrations, or reduced performance. Address these issues promptly to prevent further damage and ensure the longevity of the assembly.
Konklusjon
Installing a swing drive assembly is a detailed process that requires careful preparation, precise execution, and regular maintenance. By following the steps outlined in this guide, you can ensure a successful installation and optimal performance of your machinery. Remember to prioritize safety and consult the manufacturer’s manual for specific instructions related to your swing drive assembly. Happy installing!